All posts by Vikki

Electric Stove Care

Electric Stoves

I don’t claim to be an expert at buying larger appliances like stoves, dishwashers or refrigerators. But I do know a thing or two about cleaning and care. A lot of people don’t know the the cons of owning a glass stovetop or not to use the self-cleaning function on their ovens. I do know how to take care and not ruin your expensive appliances, and also how to not ruin your food in utilizing them!
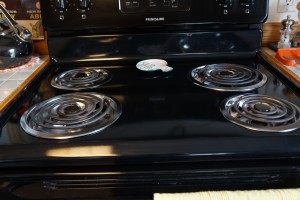
My clean stovetop!
My clean stovetop!

First I should probably start off by explaining the differences between a regular electric stove, a glass/ceramic top stove, and induction top.

Glass/ceramic are the same thing. Ceramic turns to glass when fired, so that’s why you hear these names used interchangeably. These stoves are beautiful, and I recommend them – if you don’t ever plan to cook on it. 😉
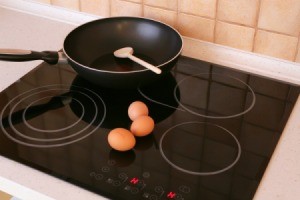
Glass / ceramic stovetop

Why? They take forever to heat up. I had a customer come in and complain to me about his new copper-core cookware not heating up as fast as he was told it should. A co-worker of mine was dealing with the man and I happened to overhear his complaints. Yes, copper cookware should heat up relatively faster than normal aluminum-core cookware. So I stepped in and asked if he had a glass stovetop and he said that he did. “Did your other cookware take a long time to heat up, also?” Turns out that, of course, it did. So I explained to him it was his stove and not the cookware, because at the time I was actually renting a home with a glass stovetop and had a mix of aluminum and copper-core cookware, including the brand he was complaining about, and had the same problem.

Glass-top stoves also require non-scratch sponges to clean them, and can be quite difficult to clean unless you feel safe using a razor-blade on it. My grandfather owns one and refuses to crack eggs in the pan on the stove – he takes the pan off of his stove after it’s warmed up and cracks the eggs away from the stove because he says he always ends up dripping a little on the stove and has a heck of a time getting it off later when it’s burned on.
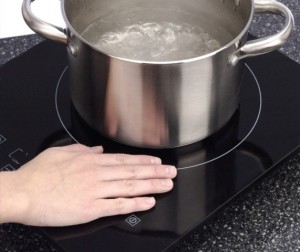
Induction stovetop
Induction stovetop

Induction stoves are not the same thing as glass-top. They are actually great if you can afford one! However, you do have to have relatively specific cookware in order to be able to utilize them because they work by magnetic induction. This means your cookware has to have a magnetic base in order to work on it. You will sometimes see people looking at cookware with a magnet in their hand and this is why. It only has to be magnetic on the bottom. The stovetop can actually be on ‘hot’ and you can pull the pan off and touch the burner and you will feel absolutely nothing!!! So you cannot use cast-iron cookware on an induction stovetop because cast iron does not have magnetic qualities. A lot of cheaper nonstick cookware will also not work on induction. Copper-core cookware actually works with induction the best – Chantal actually made their copper line specifically to work with induction.

Use and Care

Alright, so there you have it on those ‘other’ options for electric. Of course we are all familiar with basic old electric stoves (unless you’re lucky enough to have had gas your whole life, which I have not, so I will not even pretend to give advice there, and am also thoroughly jealous of you!)

One thing you really need to know when cooking on an electric stovetop is that all cookware manufacturers heartily agree that stove manufacturers make them TOO HOT! So, you should never, ever turn any of your dials all the way up to the ‘High’ setting. You should be able to successfully sear meat on a ‘Medium-high’ setting. I know a lot of you are probably impatient like me and just like to jack it all the way up to get things moving, but you should really just set it at the temperature the recipe calls for (unless it says ‘high’ because of course you are now going to always read that as ‘medium-high’, correct???) and wait and let it come to that temperature that way.
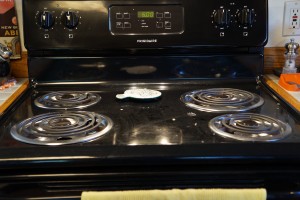
My dirty stovetop
My dirty stovetop

I take the burner plates off of the stovetop about once a month (or more if I make a huge mess!) and scrub them down really well. A lot of people don’t actually know that most stovetops lift up so you can clean under them. I wipe that all down and leave it open to dry for a little bit before assembling it again. This is where getting a name-brand stove comes in handy – easy to find burner plates to replace if you ever need to. You can actually find the plates at the Dollar Tree, of all places, but it’s not ever going to be guaranteed that they will be the exact right fit unless you get lucky or get them from the vendor. I believe Target and other stores of that nature also carry burner plates. These are both reasons why I had to purchase a new stove when I bought my home – the replacement burner plates did NOT fit it, and the top didn’t open up to clean underneath it. And clearly the previous owners didn’t understand the concept of cleaning a stove. I got it clean, but I couldn’t deal with my pans wobbling all over because the burner plates didn’t fit.
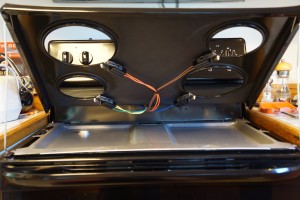
My stovetop lifted up

Now with the oven, what temperature you can go to will always depend on what type of cookware you are using. Most ceramic cannot go much over 400 unless you have something stronger that is high-fired, like Le Creuset or Emile Henry. Read your instructions! Anything over 500 or broil should be done in metal bakeware. I also strongly recommend investing a few dollars in an oven thermometer. A lot of ovens either don’t start out at the correct temperature to begin with or will at least change temperature over time. I remember with my mom’s old stove we had to always set it about 25 degrees lower than recipes called for because it got so much warmer over the many years she owned it.

As for the self-clean function – DON’T USE IT! Ever. Seriously!! When I bought my new stove two years ago the salesperson reconfirmed this notion with me. The self-clean function gets far too hot, and it will eventually burn out the electronics up above. This is the most common cause of broken stoves, people, so take heed! There are plenty of other ways to do it, and quite honestly, before I knew this, whenever I did have the opportunity to have an oven with this feature, I found myself doing the Easy-Off method first anyway because self-clean just bakes everything on harder. There is also the age-old trick of leaving a bowl of vinegar in the oven overnight to help loosen everything off. And I highly recommend getting an oven liner so that you really don’t ever need to mess with it. They are usually about $20 which seems high for something so small, but it’s worth the investment, trust me! You can easily wash them off in your sink with hot, soapy water and put them back into the oven.

Gas Stoves

OK, I only know that I dream about one day owning one and learning all the tips and tricks to share!! 😉
Slow Cookers

Slow cookers. Crock-pots. Is there a difference? No. Does it matter which brand you buy? Probably a little, but not really.

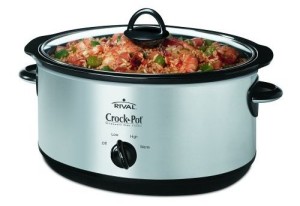
Rival Crock-Pot with manual switch

A little more detail! Crock-Pot is a brand name given to the original slow cooker (the very original name being the “Naxon Beanery All-Purpose Cooker”) by the Rival Company when it bought Naxon in 1970. This can still be confusing, as seen by Google Shopping – it lists Crock-Pot and Rival as two different brands. Generally, you will see the little Rival logo above the Crock-Pot logo, but not always. The kicker? Rival is now owned by Sunbeam. My guess is that’s why not all of them have the Rival logo.

Ok, was that clear as mud? Simplified – slow cooker is the official term and Crock-Pot is a brand name. It’s like Kleenex and tissues. That’s the BEST kind of marketing, because it’s free! (Marketing major over here, kids.)

Alright, now that we’ve cleared that up, the next thing to discuss are the differences between all these slow cookers. Generally it will be the capacity size and how many buttons/cooking options are offered. All slow cookers will have an electric heating base, a ceramic cooking pot/crock (get it? Crock-Pot!), and a glass lid with or without a vent hole in it.

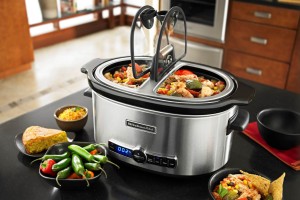
Kitchen Aid 6-qt. slow cooker

Capacity is clearly something you need to decide for yourself. How many people do you usually cook for? What types of things are you hoping to cook in your slow cooker? Remember, you can always make less in a larger vessel, but you cannot make more in a smaller one! You just need to adjust your cooking times and temps. 😛 Considering shape, there are both oval and round slow cookers. It might be easier to fit a small bird, a roast or other meat into an oval shape, but the choice is purely personal preference.

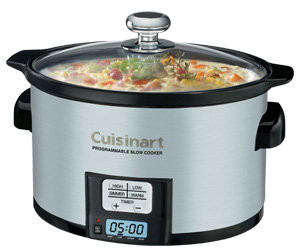
Cuisinart 3.5-qt. slow cooker

I think Cuisinart makes the smallest slow cooker at 3.5-quarts. This isn’t counting any of the smaller buffet serving warmers (key word ‘warmer’ – they don’t cook!), like the Slow Cooker “Little Dipper” 16-oz. warmer that usually only comes as a free gift with a larger slow cooker. (You can usually find them for sale alone at Goodwill, however!) Several brands make an 8-quart, which is the largest I think you can find. This is an improvement because a couple of years ago it was hard to find larger than 6- or 7-quarts.

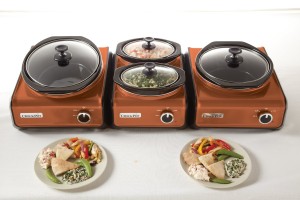
Cooking options are generally very simple on most slow cookers, having 2-4 settings that include: Off, Warm, Low, High. Warm is not a cooking mode, it just keeps the food at temperature when cooking is done. Crock-Pot makes a lot of cool buffet serving warmers that only keep already cooked food warm – they don’t cook, but they’re great for people who entertain a lot!

Crock-Pot Hook Up series buffet servers - you can mix and match the pieces you want to hook to each other!
Crock-Pot Hook Up series buffet servers – you can mix and match the pieces you want to hook to each other!

Programmable slow cookers will automatically switch over to “Warm” mode after a certain amount of hours on a cooking mode, however, I have only come across one that will turn itself completely off. The Cuisinart programmable slow cookers all have an 8-hour “Warm” mode maximum, at which point it will beep five times and turn itself off automatically.

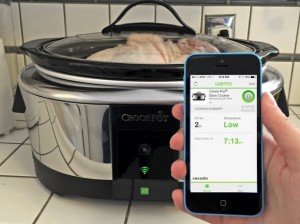
Ah, but alas, technology has caught up with us! I have discovered another one that you can control via an app on your cell phone! The Crock-Pot 6-quart Slow Cooker with WeMo. In searching through the manual and FAQs, it seems like this will be the first slow cooker that you could load food into and start at a later time – but beware, as the reason no one else has done this is for food safety reasons – you don’t want to leave uncooked food out for very long, so I think the idea behind this smart cooker is that if you’re running late, you can easily turn it off or down to warm until you can get home to it, not that you can dump everything in and leave it sitting out to spoil for a few hours before you turn it on.

Crock-Pot with WeMo (smart slow cooker!)

Vent Hole in Lid

I can’t seem to find a reliable source of information from vendors or consumers about some slow cookers having vent holes and others not. I did find this site that claims, as many others do, that newer slow cookers run much hotter than those of the old days. So my final thought on the matter is that the manufacturers are adding these holes to prevent explosions. This isn’t a pressure cooker – you don’t want a perfectly tight seal, or else you will get a pressure build-up and potentially blow-up your dinner.

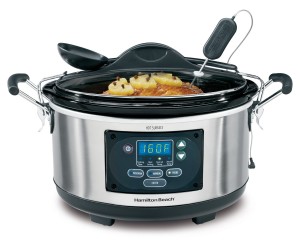
Hamilton Beach slow cooker with digital probe thermometer

A lot of folks will encourage you to wrap your entire cooker and lid with aluminum foil to try and make the seal impenetrable, but the vent hole is too small to let THAT much moisture out that your food will dry out. You can always add more liquid if you notice your cooker is drying up faster than what the recipe calls for.

If you let your food cool inside of the crock pot, it can create a vacuum seal that can make removing the lid extremely challenging, so this is another reason for the vent hole. Some slow cookers come with a meat probe and the probe fits in the vent hole and rests there nicely.

Multi-Cookers

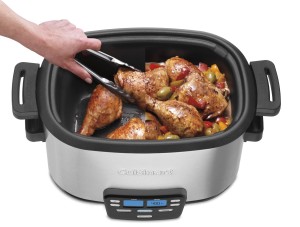
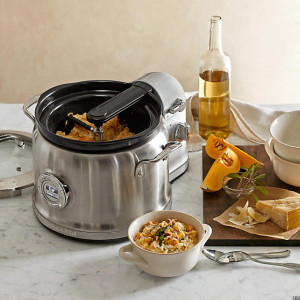
Cuisinart multi-cooker

Everyone is coming out with multi-cookers over the last couple of years, and depending on the brand, they can usually do at least three things – slow cook, brown/saute, and steam. Some can also bake, cook rice, roast, or even pressure cook! Since all brands and models are so new to the market I can’t fully back buying any one over the other. Cuisinart, Kitchen Aid, and Oster are usually good bets – I am pretty certain that Cuisinart put out the very first one and everyone else followed suit.

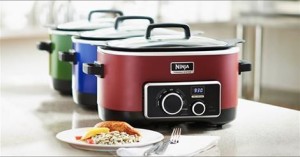
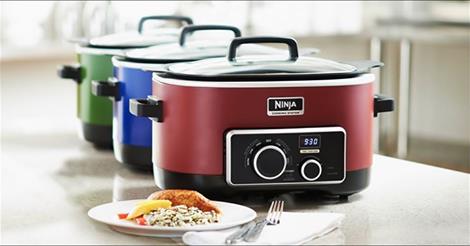
I do personally own a Ninja 3-in-1 cooking system, which is considered a multi-cooker because it has a slow cooker setting, a stovetop setting (brown/saute), and an oven setting (bake/roast). There is now a 4-in-1 that also has a steam setting.

So far I really like the Ninja – I’ve had it for almost a year and have used it quite a bit. I have personally never been much into slow cooking and when I finally got a little 4-quart Crock-Pot a couple of years ago, I hardly used it. I was annoyed by recipes that claim you can make things like pulled pork in your slow cooker and have it turn out like it normally would. (Maybe this happens for other people, but not me! Haha) And don’t get me started on using another pan and starting on the stovetop, then transferring to slow cooker….and/or transferring afterwards to the oven! No! Slow cooking is supposed to be easy, one-pot cooking in my mind. And the Ninja accomplishes that because you can cook the meat on the stovetop setting and then plop everything else in and turn it over to slow cooker mode. Roast a chicken then immediately make your stock! Beautiful!

Ninja 4-in-1 cooking system

That being said, I think any multi-cooker would bring me the same satisfaction. However, the downside is that all of these have nonstick aluminum cooking pots inside of them, which of course they all claim are dishwasher safe, but the dishwasher detergent is just too harsh for nonstick and I got scratches on mine after one wash. Lesson learned – I leave it out of the dishwasher now! So I would advise the same on any of these other multi-cookers, also. The ones with glass lids, at least the lid can go in the dishwasher (the 3-in-1 doesn’t, so I have to hand wash, but the 4-in-1 comes with glass). Kitchen Aid is elusive about the material of their cooking pot, but call it the “CERAMASHIELD™nonstick cooking pot with pouring spout” and emphasize that repeated dishwashing can reduce the effectiveness of the nonstick coating, so I feel secure in saying it’s probably also an aluminum pot with nonstick coating, just this specific brand of coating.

The Ninjas are both 6-quarts, as is the Oster brand. Cuisinart’s and Kitchen Aid’s multi-cookers are only 4-quart capacity. They all come with a small roasting rack included, and some of them have other accessories you can purchase to go with them, including a ‘stir tower’ for the Kitchen Aid model!

Kitchen Aid multi-cooker with optional Stir Tower attachment


Read The Kitchn’s tips on what mistakes to avoid when using your slow cooker.

Pasta Makers

Hand Crank Pasta Makers

Some people want to be old school and crank out their pasta by hand. I must warn you that this is a pretty daunting task, but if you’re looking for a good workout, you won’t be disappointed! It’s also helpful to have a friend, but I think the same would be true with an electric one also.

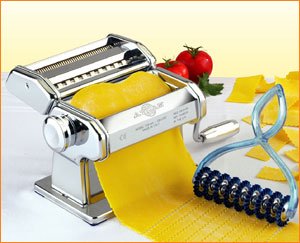
Atlas pasta maker with hand cutting tool

So these machines all basically look the same. The biggest difference is going to be quality, which will obviously be higher with one made in Italy. Marcato Atlas and Imperia (owned by Cucina Pro) are both brands that are made in Italy. The Atlas machine is pretty widely distributed, and you can also find different attachments for it, like a ravioli maker or a motor. 😉 Roma is a less expensive brand made in China.

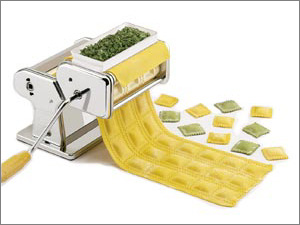
Atlas ravioli attachment

Electric Pasta Makers

There are many brands of electric pasta makers on the market, none of which I have any personal experience with using or selling. The good news, however, is that you can utilize the information I do know about the Kitchen Aid pasta attachments and make an educated decision, as by looking at them you can deduce what style of pasta maker they are – a rolling/cutting system, or an extruder.

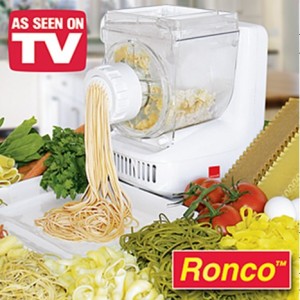
Ronco electric pasta maker

A true rolling and cutting system is more like the traditional hand crank pasta maker. A pasta extruder is figuratively pushing a ball of pasta dough through shaped holes in a disc like Play-Doh. The first method is going to be the best way to do it, but with the extruder method you can get shaped noodles like macaroni.

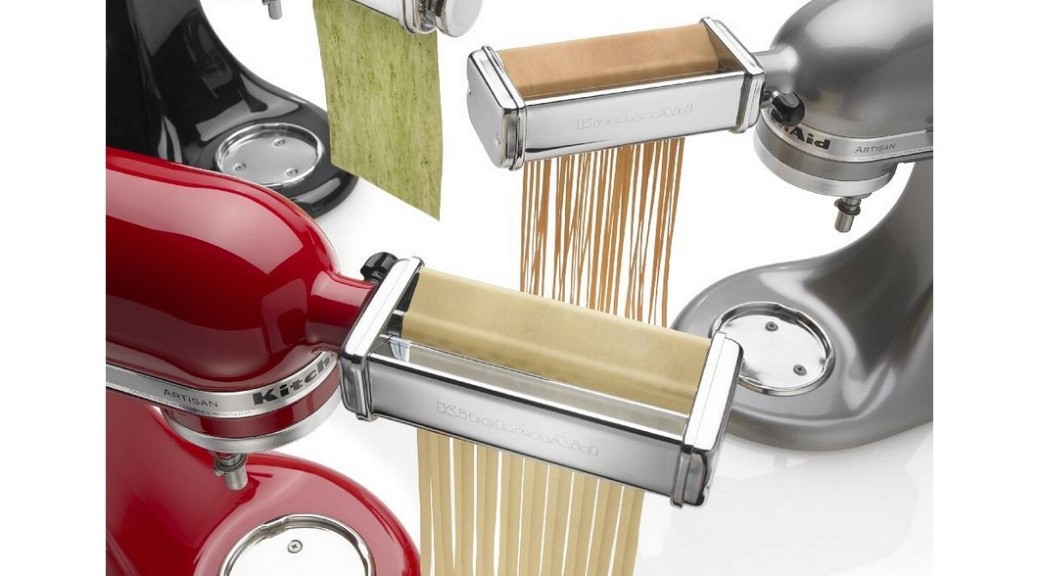
Kitchen Aid Attachments

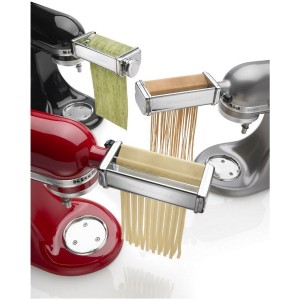
Roller – This is the basic pasta roller to flatten out your dough for lasagna noodles or to cut into noodles after rolling it out.

Cutters – Kitchen Aid sells a variety of different size pasta cutters for use after rolling your pasta dough out. Please note that if you buy cutters individually you will also need to purchase a roller.

Kitchen Aid roller and cutter set (KPRA)

**I get very annoyed that they use all of their pasta terms so interchangeably. It makes it extremely difficult for both employees in stores as well as the end consumers to know exactly what they need. I have seen sets other than these available to order in retail stores, as well, so don’t believe everything you see on the Kitchen Aid website to be all there is!

  • Thin=Capellini=Spaghetti=Angel Hair
  • Thick=Lasagnette=Fettuccine=Egg Noodles

Sets – There are a few different sets you can buy, most of which include a roller and some combination of cutters. There is one set that doesn’t include the roller, so beware if you don’t already have one.

  • Pasta Excellence Set – Includes the pasta roller, ravioli maker, and capellini, lasagnette, fettuccine, and spaghetti cutters
  • Pasta Roller & Cutter Set – Includes the pasta roller, fettuccine and spaghetti cutters
  • Pasta Cutter Set – **NO ROLLER** Includes lasagnette (fettuccine & egg noodles) and capellini cutters (spaghetti & angel hair)

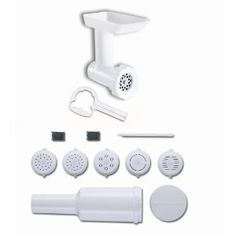
Food Grinder/Pasta Plates – I believe that with the advent of the Pasta Extruder that Kitchen Aid has discontinued production on the pasta plate set that you used to be able to buy to go with your Food Grinder attachment. It was a set of 5 discs with different noodle shapes for about $30.

Kitchen Aid Food Grinder and Pasta Plates

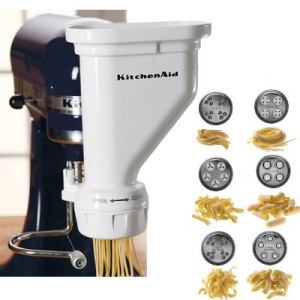
Gourmet Pasta Press – This is a big step above the Pasta Plates you can get for the Food Grinder attachment. There are 6 pasta plates, and you can actually make spaghetti and bucatini pastas, along with your short noodles. It also has a conveniently attached storage piece for the plates you aren’t utilizing.

Kitchen Aid Gourmet Pasta Press

Ravioli Attachment – This is a large attachment that will really help you make a lot of ravioli at once. It seems like this would be easier to do with a friend’s assistance!

Click to read more about Kitchen Aid stand mixer attachments.

Hand Tools & Accessories for Pasta Making

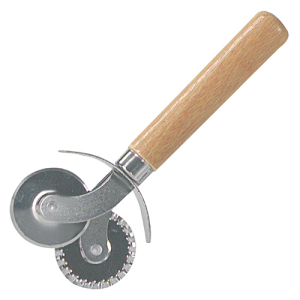
Pasta Cutting Hand Tool – There are a few different pasta cutters you can find to use for hand-cutting your lasagna noodles. Typically it will look like a small pizza cutter, with either one straight blade, or else also have a second blade that is crimped.

Pasta cutter
Pasta cutter

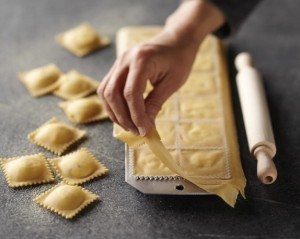
Ravioli Trays – There are many varieties of ravioli trays for making them by hand with your freshly made noodles. Generally the base piece will be plastic and the piece that shapes and cuts them is metal.

Ravioli tray
Ravioli tray

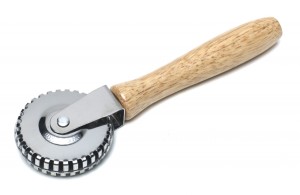
Ravioli Cutter – A metal crimping wheel to make ‘free-form’ ravioli shapes however your heart desires!

Ravioli cutter

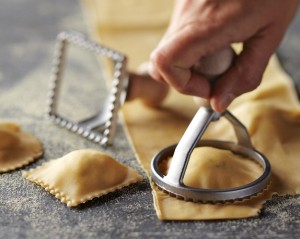
Ravioli Stamps – A ravioli stamp is a simpler version of a ravioli tray, and it is figuratively a circle or square with a handle so you can stamp out individual raviolis.

Ravioli stamps

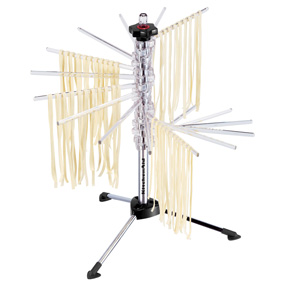
Pasta Drying Racks – If you’re not eating your pasta right away, you’re probably going to want to dry it to store for later use. You can find basic wooden racks like this one from Atlas. Atlas and Kitchen Aid both make a plastic rack with rotating arms.

Kitchen Aid drying rack

Boston Cream Poke Cake Recipe

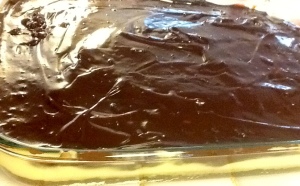
Boston Cream Poke Cake

with microwave chocolate ‘ganache’

boston cream poke cake slice

I only learned what a poke cake was within the last year. Once I learned it, it seemed like everyone I know was making poke cakes! Boston cream is my all-time favorite donut, so when my brother said he wanted chocolate cake, this was what I decided on. The original recipe calls for vanilla cake mix, but I made it with chocolate and it was delicious!

I was also looking for an easy recipe – some of these poke cake recipes can be quite intricate! I thought they were supposed to be cake mix, jello or pudding, and some frosting – easy peasy! I’m sure you could easily buy a can of frosting, but it might be difficult to spread over the pudding. This ‘microwave ganache’ is pretty simple and made with ingredients you should already have in the pantry.

Ingredients:

Cake:

1 box cake mix & ingredients it calls for – traditionally vanilla, but mix it up with chocolate or whatever sounds good!

Boston Cream:

1 box vanilla or French vanilla pudding mix & ingredients it calls for – again, unless you wanna mix it up!

‘Ganache’:

1 1/2 cups sugar

3 tbsp. corn starch

4 1/2 tbsp. cocoa powder

1 1/2 cups boiling water [I boiled mine in the microwave in the same bowl I was going to microwave it all together in anyway 😉 ]

1 tsp. vanilla

1 tbsp. butter

[Or substitute a microwaved can of chocolate frosting!]

boston cream poke cake

Directions:

Make the cake mix as instructed on the box in a 9×13 baking pan. Set it aside to cool when done.

After the cake is set aside cooling off, start making your pudding on the stove as instructed on the box. Stir constantly. Start boiling your water for the chocolate ‘ganache’ while you’re stirring the pudding.

Set the pudding aside to cool off. Mix your sugar, cornstarch, and cocoa powder into your bowl of boiling water. Microwave for 2 minutes. Stir. Microwave another 2 minutes. Stir in vanilla and butter and allow to cool.

Poke holes all over your cake. Spoon the vanilla pudding, which should be a little more thickened by now, all over your cake getting it into all of the holes and maybe even down the sides. 😉 Spread the ‘ganache’ over the top evenly.

Allow the cake to chill in the refrigerator for at 10-15 minutes, then serve & enjoy!

The earliest version I can find of this online is from The Country Cook, although the version with the ‘ganache’ comes from Oh, Bite It!

Eating & Drinking in San Francisco

I just made my first visit to San Francisco, and I ate as much Mexican food as my stomach would allow. 😉 My hosts were located near the Haight/Ashbury area, but we did manage to make a couple of trips to the Mission district! The great thing about San Francisco is that everywhere you go there are amazing, local ingredients available.

Restaurants I Ate At:

Street Taco – Carnitas burrito was enormous!

Gott’s Roadside – Bleu Cheese Burger, fries & strawberry milkshake

Gott's Roadside burgers, fries & shakes!
Gott’s Roadside burgers, fries & shakes!

Pica Pica – Grilled chicken cachapa and yuca fries

Boudin Bakery at Fisherman’s Wharf – Classic round sourdough 1lb. loaf

La Taqueria – Carnitas burrito with avocado & queso OMG the pico de gallo! The whole thing was SO JUICY!! I think I agree with the ‘best burrito in the country’ rating they just got!

La Taqueria
La Taqueria – the best tacos & burritos in the whole world!

Pork Store Cafe – Huevos rancheros for the first time ever, with chorizo & hash browns

Loving Hut – vegan cuisine, these guys actually have 40 restaurants in the US and 200 internationally, including where I live in Portland, OR.

I probably wouldn’t have ever stumbled into the one in Portland being an omnivore. Luckily my friend is a vegan and knowing all of the places we could get vegan fare, thought I would get a kick out of this place because they follow an interesting religious philosophy led by the Supreme Master Ching Hai and play her videos in the back of the restaurant. Dishes vary by location; I got the spicy pad thai, which wasn’t very spicy, but wasn’t bad. Nothing stood out as better than any other thai/Asian food place, but a very interesting concept!!

Bars I Drank At/Beverages Consumed:

ToronadoPliney the Elder (Double IPA)

Toronado beer bar
Toronado beer bar

Gestalt – Bear Republic Racer 5 IPA

Rosamunde Sausage Grill – one of the IPAs on tap {someone bought it for me!} & the most delicious french fries ever!!

Velvet CantinaGinger Ginger – house infused ginger tequila, ginger ale on the rocks. I am not much of a cocktail drinker but no beer on tap and a huge tequila selection, you’ve gotta go with what the bartender recommends! Woah, strong! And free chips & salsa, of course!

Pliney the Elder
Pliney the Elder