I originally started this blog out saying that I don’t recommend any one brand over another because (this part didn’t change) they aren’t built to last so you’re going to have to plan on buying a new one every five years (give or take a few). I originally stated that you should spend around $30 on a Mr. Coffee, Sunbeam, Proctor-Silex, or Delonghi. These guys are really starting to step up their game (price-wise, at least!) and it’s kind of hard to find a cheaper coffee maker! I still don’t trust that any one of these is better than another, and it’s such an inexpensive item that manufacturers kind of realize at this point most people won’t bother to return them, so they just keep churning out new models telling you it’s better than the last one so you’ll buy a new not-so-great one.
I used to have several favorites back when I first started working in housewares, but drip coffee makers have really gone down in quality over the years and it’s become increasingly difficult to find one not made in China. I could be wrong, but the only manufacturer I can still find that is made in the USA is Bunn, which of course are the restaurant industry’s standard machine. They do make home models and I hear great things, so those are probably the only gourmet machines worth that kind of money.
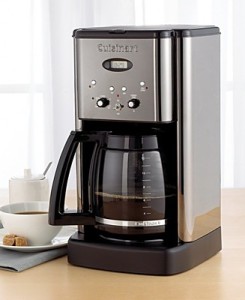 |
| Cuisinart Brew Central – Top Pick! |
If you have a good old machine, keep it until it dies! There’s no reason to replace a machine that works with the poor quality of drip machines these days. The old Krups machines were great and always highly rated; they started outsourcing almost a decade ago and we got almost every single coffee maker and electric kettle we sold returned to us–to the point that we stopped selling all Krups products completely.
Cuisinart is generally a good price range and their appliances are usually good. Every now and then they’ll miss with something, but otherwise a solid brand name and if you fill out the warranty card (I recommend doing this with all of your appliances!!), they at least console with a three-year guarantee. In the world of small electrics, one year is standard. The one I specifically link to above, the Brew Central*, is their best-selling model and the only one they’ve kept manufacturing. (They continue to put out other new models, but this one is the tried-and-true!) You will actually see this model used as a prop in tons of TV shows and movies, interestingly enough!
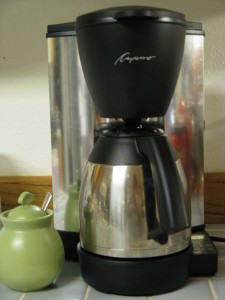 |
| My old Capresso |
|
Capresso used to be a really great gourmet brand, but they started outsourcing a few years back and the quality eventually started to decline*. I think they are better now, but not for the money they cost! Breville is generally a good appliance maker, but unfortunately I don’t have much experience with them. I’ve only really heard good things about their small electrics, however they haven’t been on the market long enough for folks to say they’ve had their machine for a number of years to prove their staying power as of yet.
The one thing that people have the biggest issues with is that their drip machine “leaks water”. The issue is in the name—drip machines drip! Obviously if it’s pouring water out of the water tank you have a concern, but for the most part your machine is going to leak a little.
Thermal carafes are always going to be a pain to pour out of because of the way they have to design the lids to seal the carafe. No matter how much money you spend, a thermal carafe is always going to be an annoyance. A great trick with these guys is to, even if you’re preparing the night before, rinse the carafe with hot/warm water then seal the lid. This will trap heat in the carafe, causing your coffee to stay warmer even longer!
You want to be extremely careful with grind and brew machines. In that respect I would lean towards spending a tad more on a Capresso like this one (or something similar) that has the grinder in a completely separate compartment than the water tank. (Capresso actually makes both so be careful!) You are always going to run the risk of your grounds getting moist from the steam the machine produces, but if they are in separate compartments, that risk is minimalized. We will discuss coffee grinders in a separate blog, don’t worry!
Now, on to some of the less simple ways to prepare your coffee…(that being said, I’m skipping over the really basic stuff, but let me know if you want to know more about those methods, too! These are just the more common ones requested.)
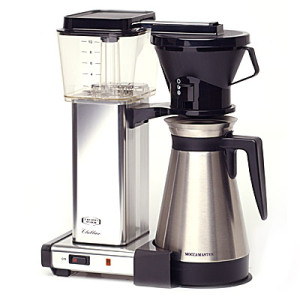 |
| Moccamaster by Technivorm |
The one drip machine that actually stands out and will produce a quality cup of coffee (so say the coffee connoisseurs of the world, anyway!) is the Moccamaster by Technivorm. This is because the Moccamaster makes coffee more like a French press, which is supposed to be the ideal method to brewing the perfect cup of java. This machine’s heating element actually gets the water up to 212°F, which is the ideal water temperature for brewing. It is guaranteed to be this hot because if it doesn’t reach this temperature, the mechanism will not force the water upward into the machine to brew. Science! The water drips out showerhead-style and you can actually “stop” the brewing and let it steep for a little bit in the filter cone area if you want to be more hands-on with your coffee.
The Moccamaster is not usually even rated against other drip machines because it’s not programmable and requires a lot more effort than regular coffee makers, something the majority of consumers don’t care to do! You can’t even put water in the machine overnight to be ready in the morning because it will slowly leak out of the bottom throughout the night. Technivorm actually didn’t want to make a thermal carafe, either (for the reasons I listed above), but since people demand them, the one they created is probably the best experience I’ve personally had utilizing a thermal carafe from a drip machine. It’s the reason why it’s shaped the way it is, but it pours pretty darn well! To me, that proves even further that they put a lot of care into their product.
These have actually been around forever (made in Sweden, all Swedish parts except the heating mechanism, which is German), just not as popular in the United States until recent years. I met a woman who told me a fabulous story about how her granddaughter once said, “Grandma, your no-name coffee maker makes the best coffee I’ve ever tasted!” and how she just laughed because little did she know the cost of her no-name machine! But amazingly enough, she’d already had it for over 20 years!
 |
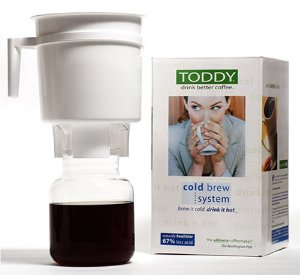
| Toddy cold brew system |
If you need to have less-acidic coffee, you would want to consider a cold brew system like the Toddy. This method requires you to prepare the coffee up to 24 hours in advance by letting the grounds sit and steep with cold water and a filter. What you get afterwards is a very strong coffee concentrate that needs to be diluted with water or milk in a 1-3 ratio (1 part coffee, 2 parts water or milk). This is also the ideal way to make iced coffee because what people often do is dump hot coffee on ice cubes, which affects the taste of the coffee in a negative way. You can actually utilize a French press the same way as the Toddy and just let it steep overnight versus a few minutes.
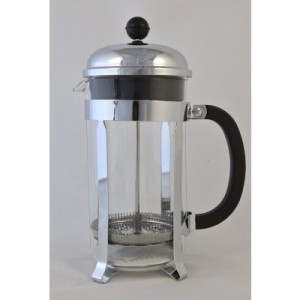 |
| Bodum Chambord French Press |
Ok, so I’ve mentioned French press a few times now. Like I said, true coffee aficionados say this is the best method to produce a superior cup. This is because you let the grounds steep for several minutes and you utilize boiling hot water, which is ideal. How does it work? You put coarse grounds in the carafe, pour the hot water over the grounds, and let it steep for 3-4 minutes. Most people have the lid on while it’s steeping to keep the heat in, but keep the plunger, which is attached, up with the lid. When ready, you press the plunger down, keeping the grounds in the carafe, but allowing you to pour the coffee out. You can steep the coffee as long as you like, and the longer you do the stronger it becomes. You can use a French press to make loose leaf tea, too, but you cannot use the same carafe for both as the coffee taste will remain in the mechanisms. You can now buy all sorts of varieties of French presses, but I would steer clear of the travel mugs unless you are a very fast drinker. The coffee just keep steeping until you finish drinking it, so it can start to get bitter! Bodum is probably the most well-known French press manufacturer.
A stovetop espresso maker would be another way to make a stronger cup of coffee than a drip machine. These originated in Italy, with Bialetti being the most famous brand name. These work like mini percolators. You put water in the base to just below the “fill line” which is a little screw and nut. You place the filter in this base piece and fill it with more finely ground coffee—do NOT pack it in like an electric espresso machine (tamping would be the proper term)!! With a stovetop espresso you want the grounds to be loose so the water can perk up through them. Put the stove burner on a low heat and let it perk for a few minutes. That’s it!
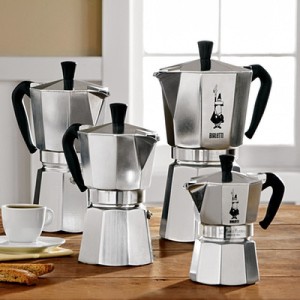 |
| A family of sizes! Bialetti original stovetop espresso maker |
As you can see you’ve got a lot of options to make yourself a cup of coffee. For now, electric espresso makers are a whole other ballpark that we will discuss in a separate blog. Let me know if there’s a brewing method you’re curious about!
Electric Espresso Machines
Coffee Grinders
*Jura Capresso, the heavy-duty electric espresso machines, are still proudly manufactured in Switzerland and are of the highest quality! As I mention in they Electric Espresso Machines blog, this is my top-rated dream machine!!
**Favorite story about selling one of these: An older couple is shopping for a new coffee maker and the wife already has this one written down as one that was rated highly in a magazine. I show it off, show them the other brands and choices, but repeatedly tell her that, “Yes, this is a really good one!” The wife keeps asking me, “What else does it do?” so I have gone over every single specific detail after a certain point. The husband finally steps in and saves me by saying, “What else do you want it to do? Make you toast, too?” and tells me they’ll take it. 🙂