Category Archives: Kitchen

How I Learned to Stop Worrying and Love the Dishwasher

I will admit to you that a lot of issues with kitchen wares arise out of putting them in the dishwasher. I grew up without a dishwasher, so I’m pretty great at hand washing them and don’t have an issue doing them that way. I’m also pretty fast at it so it doesn’t take up hours of my day. 

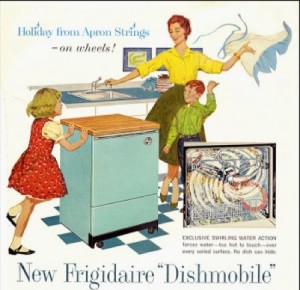
sexist_dishwasher_adI have used dishwashers since then. I’ve known people to have lovely looking dishes come out of theirs. I’ve lived with people who bought cheap dishwasher soap that didn’t work and had nightmarish issues with them at jobs. But now that I understand them a little bit more, how various products react in them, and have been using one in my own home a little more regularly – I have learned to stop worrying and love using my dishwasher!

The Basics:

  • Don’t put things in the dishwasher that aren’t dishwasher safe. They usually say that for a reason.
    • Cheap plastics leach BPA, some ceramics aren’t strong enough to handle bumping each other with the shaking motion of the washer, and certain finishes can’t handle the harsh environment, etc.
  • Pans on the bottom, plastic on the top. Some items will specify they are top-rack only. The heating element in the dishwasher is on the bottom, so this is to keep the item away from the heat.
  • Do not lay knives down on the top rack! If they don’t fit in the utensil holder, hand wash them.
  • Wood does not ever go in the dishwasher. (Epicurean brand can because it’s a special compressed wood that is dishwasher safe.)

Dishwashers get EXTREMELY hot, so that’s the reason a lot of items can’t go in them in the first place. They are the problem with plastic leaching BPA, so if you don’t have a dishwasher you really don’t need to worry about it. Plastic baby bottles are almost never dishwasher safe and unfortunately a lot of parents try putting them in on “sanitize mode” which is usually the hottest setting on the dishwasher. Not a good idea!

Notice the heating element is in the center of the inside of the machine.

I have overcome this issue by sticking to the lower-level settings on my dishwasher. I have a couple of settings above “normal wash” and I have never touched them. If you have anything dirtier than that it’s not even worth trying in the dishwasher, in my opinion. Whatever is stuck to the pan will just get baked on inside of the machine.

Which brings me my next tip – turn off the “heated dry” setting if your dishwasher allows you to. This is just a waste of electricity (in my opinion!) that literally just bakes the dishes after they are washed, so if anything is still stuck to them, it just got baked on harder. The dishes are hot and usually still moist anyway if you do use it, so what I do is turn it off and when the wash cycle is over I just open it up and pull the racks out so they can air-dry. The plastic storage stuff doesn’t seem to dry well so I pull them out and put them in the counter dish rack to dry. Of course this is easiest when done later in the evening so they can dry overnight.
dishwasherYour dishwasher shakes. A lot. Think about your dishes getting bumped around into each other inside of that thing for an hour while it runs. This is why ceramic dishes chip in the dishwasher, because they bump edges with each other. Same with your nonstick finish, if something is bumping into it in the same spot over and over – chipping. I worry about my ceramic bowls even though I put them on the top shelf and they are a really good brand name, so I put the dishwasher safe plastic items between all of the ceramic items to try to avoid them bumping into each other.

The worst is if you put your sharp knives flat on the top rack – they shake and cut into the plastic rungs. This is what causes  your flatware to rust, when the plastic coating is exposed inside of your dishwasher. You can sometimes remove this staining with Barkeeper’s Friend but usually you will end up having to replace all of your flatware and also replacing the racks inside of your dishwasher, which is very costly.

As I already said, if my pans are really dirty, I just resolve to hand washing them. I let them soak overnight and wash them with any other items I have that are not dishwasher safe.  Sometimes you can get away with scrubbing the pan with a dish brush or a scrub sponge and getting all the big stuff off of it so it is dishwasher-ready, however. I pretty much end up cleaning them first if I do this because if anything is stuck to the pan, it will be baked on in the dishwasher, usually. And if it does come out this way, dirty, resign yourself to hand washing them at that point – putting them in for another dishwasher cycle will not get it off!

happy-lady-with-dishwasherMy motto is, “If you love it, hand wash it,” so even a lot of the things I own that are dishwasher safe – I still hand wash. Some items I will throw in the dishwasher every now and again and it’s not the end of the world, but some little thing will happen that reminds me that I do indeed love it and I better wash it by hand next time. And actually, sometimes putting your stainless steel Kitchen Aid mixer bowl or stainless pot in the machine actually helps bring back its luster – just not every time so I only do it every handful of uses. One of my dearest kitchen store friend (and mentor) had the best saying about dishwashers: “It’s called a dishwasher for a reason. It’s not a pots and pans washer. It’s not a glassware washer.” So keep that in mind when putting items other than dishes in that machine, even if it does have special settings for those other things.

Speaking of glassware, I don’t put anything with a painted design in the dishwasher, nor any stemware. If you have really inexpensive, sturdy stemware like Libbey, that will probably hold up. Anything shaped like a martini glass is just asking to break because of the bumping. Luckily most stemware is too tall for most dishwashers unless you purchase one that has specific glassware settings. Use at your own risk! I find that the glassware tends to come out with a teensy bit of spotting, but maybe that’s because I don’t steam clean them afterwards with the “heated dry” setting!

If you just can’t stand to hand wash, make sure you read the labels of what you’re buying and avoid items that aren’t dishwasher safe. There are still kitchen items that you cannot find dishwasher safe, and I’m sorry, you’re just either going to have to not use it, hand wash it, or buy really cheap so you can afford to keep replacing it because you put it in the dishwasher anyway. 😛 (Meat tenderizer is the item I know you can’t find as dishwasher safe. Even the OXO one can’t go in there – it’s a kind of metal that will oxidize. All the generic metal meat tenderizers I have seen are the same kind of metal so there must be a reason for it.)
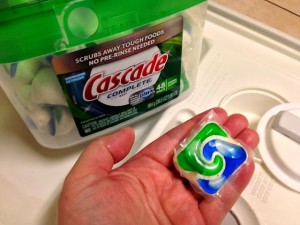
Cascade Complete Pac

My last tip will be on dishwasher detergent. The only thing I have found to work almost all the time are the Cascade dishwasher pacs. They now make a few different versions of this, and I find the Cascade Complete work the best. (Although now there is a “platinum” version I will have to try!)

Just use your best judgement, and the dishwasher can be a great help in your kitchen without costing you a fortune in replacement costs if you’re smart about how you utilize it. Of course spending the extra money for more durable kitchen wares always helps, but clearly we can’t always afford that. So the Dollar Tree items…those get hand washed in my house. 😉

And remember…if you love it, hand wash it!
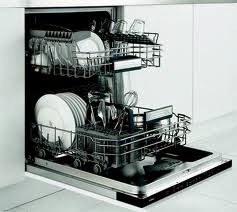
Leave dishes to air dry, like this!

Happy Cleaning! 🙂

Read more about My Favorite Cleaning Gadgets.
Ode to Pepper Grinders (& Salt, Too!)

I love fresh ground pepper! I put it on EVERYTHING! Which actually probably makes me a poor reviewer because I just leave all of my grinders set on “coarse” and rarely test out the other options. But I have used quite a few and can offer some insight and tips for maintenance, of course! First and foremost, the proper terminology is “mill” not “grinder” but I will mostly refer to them as grinders since that’s what everybody calls them.

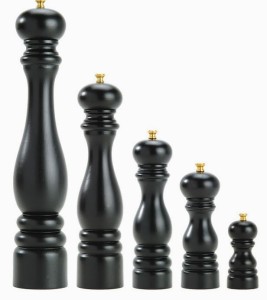
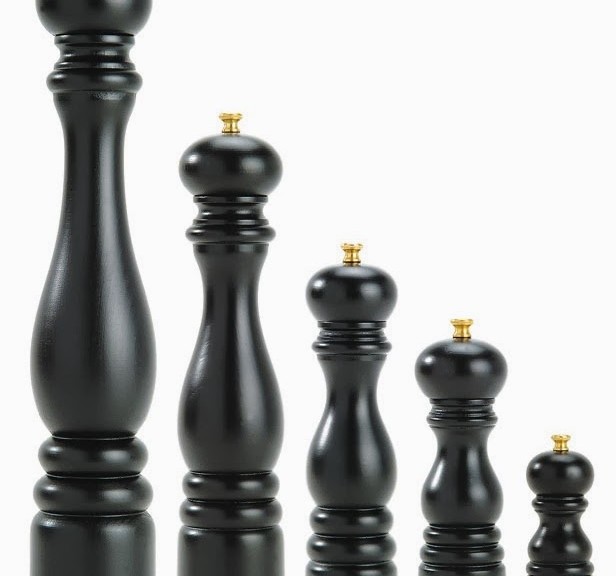
Peugeot mill in various sizes

Buying a Pepper or Salt Mill

Can’t I just buy one grinder and do everything in one? 

The simple answer is yes, but there are always technicalities that lead you to lean more towards no. 🙂 A lot of inexpensive grinders will have a ceramic grinding mechanism which is safe for anything. However, you can’t really “clean” any type of mill entirely, so if you want to grind multiple things, you will probably get residuals of other things you’ve used the grinder for.

The more important thing to consider is with metal mechanisms. Salt is highly corrosive so the metal in these grinders is usually an 18/10 stainless steel that’s been chemically treated, versus a pepper mill just having a hardened steel to make it stronger for the peppercorns.

The next thing you need to consider is if you want the mill to have multiple grind settings. A lot of basic, inexpensive grinders will not come with options. The majority with settings will have three: coarse, medium, and fine. Sometimes you can find a mill with just two settings, but that’s it! Peugeot, a French manufacturer, boasts “infinite” grind settings because you can stop the selector anywhere you want (on other models the selection you make “clicks” into place).

Trudeau Graviti mill

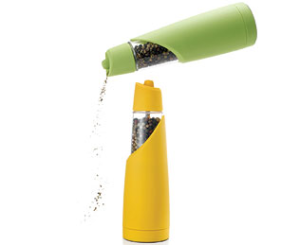
Other features you can find are upside-down grinders that store with the “top” side down to reduce the mess they can leave on your counter or table. You can also buy battery-operated grinders that work with the push of a button. Trudeau makes one of the most inexpensive and best-rated electric grinders I’ve seen, the Graviti mill. It actually works just by turning it upside down – you don’t have to push a button! Peugeot pushes the bar further by selling one that also lights up while it’s grinding for you. Hey – you’ve got to be able to see when you’re dining by candlelight! 😛

Picking a Brand

Metal Mechanism Brands*
*Most brands that make steel pepper mills produce their salt mills with either ceramic or nylon.

Peugeot made the first pepper mill in 1841 and are still made in France today. While the guarantee on their manual grinders is only 5 years, the mechanism itself is guaranteed for life under normal use. Their most popular mills come in the same style in a plethora of sizes for you to choose from. To avoid the hassle that can sometimes come with filling your grinder, they offer some models with magnetic tops that just latch right on to the mill without any fuss. They also produce electric mills and even a classic-looking box mill. I mentioned already that they boast “infinite” grind settings, but in my personal experience, I did not notice huge differences other than coarse/medium/fine.

Peugeot’s salt mills are an 18/10 stainless steel that’s been treated to prevent corrosion.

William Bounds mills


William Bounds is my favorite brand and made in the USA! They have been in business since 1963 and have a patented mill mechanism that evenly crushes instead of grinds.Since it’s not grinding the mill components together, they can guarantee it will work for life. This is where their slogan “We’ve got a CRUSH on pepper” comes from!

William Bounds’ salt mills are made with a ceramic crushing mechanism.

Vic Firth is a tad newer to the game, but also made in the USA. This is a company that is famous for making drumsticks and drum equipment – Vic Firth was a tympanist with the Boston Symphony Orchestra and happens to love cooking. Mario Batalli‘s pepper mills are Vic Firth brand with Mario’s signature green and orange colors, as well as his signature on the side.

Vic Firth salt mills are made with a nylon grinding mechanism.

Vic Firth mills


Non-Metal Mill Brands


Most inexpensive pepper and salt mills you find are nylon or ceramic grinders.

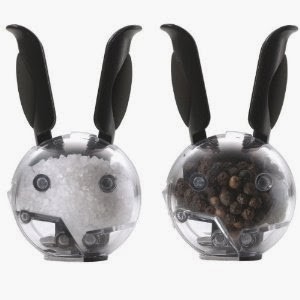
Chef’n PepperBall

Chef’n makes some pretty cool grinders, although I have to say they are very hit and miss with their salt and pepper grinders. I’m a huge Chef’n lover, but I got a lot of these returned in various models, from a simple table grinder to their more unique ergonomic styles. But when they work, they work forever, so just make sure you buy from a store that will not hassle you if you need to return it. It does look like they’ve updated the designs slightly so they might be even sturdier now.

They make some amazing ergonomic models, so if you have arthritis issues, think about the repetitive wrist movements you have to make to grind your pepper. My first pepper grinder use was a friend’s Chef’n pepper ball and I thought it was the coolest thing ever – you just squeeze! They also make some 2-in-1 options that let you grind both salt and pepper in one unit.

These models all utilize a metal rasp, but they do make ceramic grinders, too.

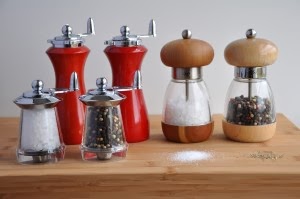
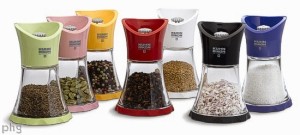
Kuhn Rikon has a couple of ceramic models, their vase grinder being the most popular. As I mentioned, they make theirs in lots of fun colors so you can color-code your spices. They make an ergonomic lever-model for those with arthritis pain.

Kuhn Rikon vase grinders


OXO‘s ceramic grinders are only a few years old, but they look great, feel very sturdy, and I’m a huge fan of OXO so I would think should be good!

**Buying tip – Williams Sonoma has a pepper grinding area where you can actually test out the grinders before purchasing. I’m not sure if this is available at all locations, but it’s really fun!**

How To Use & Maintain Your Mill

Basic mills have a body, a piece at the top (the “lid”) that turns to activate the grinding mechanism inside, and a little ball on top that screws on to the mechanism to keep the lid in place. If you have coarseness settings, there is usually a circular piece just below the lid that you can turn and hear clicking into place at the next setting. Usually there is some sort of marking to indicate fine (smaller mark) to coarse (larger mark). Left to right = fine to coarse.

To fill the grinder, you unscrew the ball on the top, remove the lid and fill the base. There will usually be something in the way to indicate the “fill line”. You always want to fill to BELOW this piece of the mill. Not even, and definitely not above. You need to leave room for the mechanism to turn. This was the most common problem when people tried to say their mill was broken – I would open it up, dump out a few peppercorns, and VOILA! It would work.

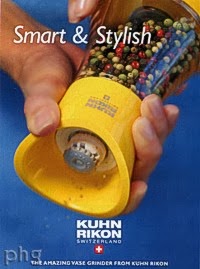
Kuhn Rikon is “upside-down”

As I mentioned before, you can find mills that work “upside-down” to keep the mess off of your counter or table. These fool a lot of people, so read the instructions first! Yes, even with something as simple as a pepper grinder, you should always read the instructions!! The Kuhn Rikon vase grinder is a great example of this and I sold them for a couple of years before I actually used one. People returned them all the time for not working but they would always return them empty so none of us working realized what the issue was – improper use! Someone finally brought it in with peppercorns and asked us what they were doing wrong and we realized they were the “upside-down” style!

There are special grinders you can buy for wet salt. You can only grind pink berry peppercorns within a pepper mix as long as there’s not a lot of pink berries mixed in. Otherwise, put them in a ceramic or spice grinder, or use a mortar & pestle to grind them up. Putting either of these two items into a regular salt or pepper grinder will ruin your grinder.

Grinding Spices

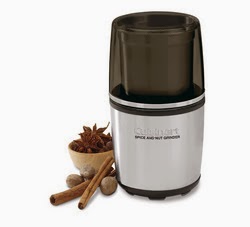
Cuisinart Spice and Nut Grinder

As I mentioned above, you can use most grinders for spices, just be careful of anything that could corrode a pepper mill. You should be able to find many inexpensive ceramic mills for spices. The Kuhn Rikon vase grinders are great and you can get it in all sorts of different colors to help differentiate between your spices!

Some people use inexpensive coffee grinders to grind their spices. You can read more about that on my “Coffee Grinder” blog, where I also mention the alternative of the Cuisinart Spice and Nut Grinder. For a few extra bucks, get something larger that grinds spices better and you can also clean out between spices.

Grinding Herbs

Microplane recently came out with an actual herb mill to grind your fresh herbs! I would love to test this out. There are a few gadgets you can find to chop herbs with, as well, but that’s for another blog!

Grinding Nuts

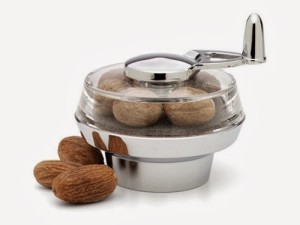
William Bounds Nut Twister nutmeg grinder

As already mentioned, Cuisinart has a great electric spice and nut grinder. Many of the manufacturers listed make several special nutmeg grinder models since that is a very popular spice. Peugeot and William Bounds probably have the most variety of other specific grinders (chocolate, cinnamon, chilies, etc.), as well.

Electric Water Kettles

I entitled this blog post “Electric Water Kettles” for a very specific reason. I do not ever want any of you associating the word “tea” with an electric kettle because you CANNOT put tea in the kettle! It is only for water. This should make sense if you are used to making tea the old-fashioned way; boil water in a kettle on the stove, pour it into a teapot, and then steep your tea in it. A teapot is usually made of ceramic or porcelain, and I would hope that it goes without saying that a teapot cannot go on your stove top to boil water in.

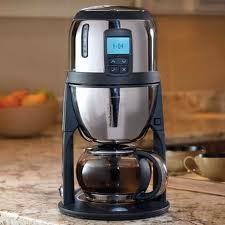
Fine T Machine

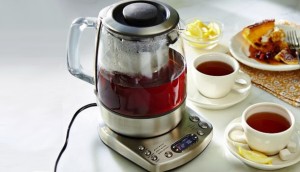
There is, however, an electric device you can both brew and steep tea in if you really want to, but it’s a tad on the spendy side. It’s called the Fine T Machine and it has several settings for a variety of tea types and works extremely well (I used one heavily at one point, even producing multiple batches for a tea tasting), so worth every penny! I also just discovered that Breville has come out with a nifty looking machine they call the One-Touch Tea Maker. I’d love to hear your reviews if you’ve used this since they are usually a good brand name.

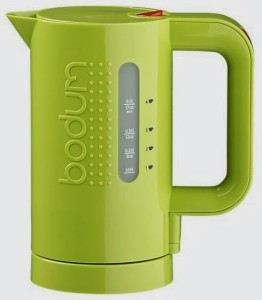
Bodum electric kettle is the best!!

As for your basic electric water kettle, hands-down the longest-lasting brand I’ve ever seen in action is the Bodum. These very rarely ever got returned (actually, we could hardly keep them on the shelves because we sold so many!), and the stores we worked in owned these and used them extremely heavily and they were all some of the original models, still perfectly functioning many years later. They’ve since improved the design a tad by making the power switch stronger and the connection to the base more durable and simpler to latch.

I know the thought of using plastic alarms a lot of folks, particularly with boiling water. First of all, Bodum products are BPA-free. Secondly, as I explain in my BPA blog, the temperature needs to be extremely hot or else whatever going in needs to be highly acidic for there to be any leaching. Boiling point is not nearly what sanitize mode is in your dishwasher! And lastly, all electric kettles have plastic on the lid, handle and base. If they are glass, there could also be “metal” handles or lids which are usually a thin metallic film painted over plastic that will eventually start peeling off.

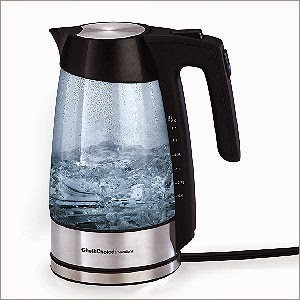
Chef’s Choice glass kettle

If you prefer the glass (especially because they do look a little more elegant than Bodum’s modern design), my next pick will always be Chef’s Choice. Another solid brand name, the kettles always seem to last a lot longer than other selections. Now that I just wrote all of that, of course Bodum has come out with a model that is mostly glass, similar to other glass electric kettle models (I swear, click the link, it says “new” over the image! :P) I used to like the Capresso, but as I mentioned in the coffee maker blog, they’ve outsourced to China and the quality of the brand is diminishing a little. I’d say it’s hit or miss if you buy one.

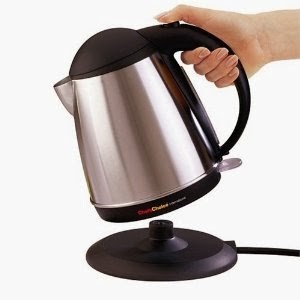
Chef’s Choice stainless kettle

Chef’s Choice also makes a couple of stainless steel models that I would also highly recommend. The great thing about all of these kettles nowadays is that they are “cordless”– they detach from the base so you can walk around and pour without a cord getting in your way!  They also mostly all have auto shut-off, which is just fabulous.  You can find some electric kettles that have temperature settings, as well.

I’m sure Proctor-Silex and Delonghi are solid enough machines, and of course Breville has a good brand reputation. Share your thoughts with us if you’ve had experience with an electric kettle you love or dislike!

Breville One Touch tea machine

Electric Espresso Machines

Electric espresso machines can be a fun addition to your kitchen or someone’s apartment or college dorm room if they can’t find the space for a full-size drip coffee maker. If you’re a serious coffee or espresso drinker, you probably want to consider something a bit heartier if you’re going to be utilizing it on a regular basis.

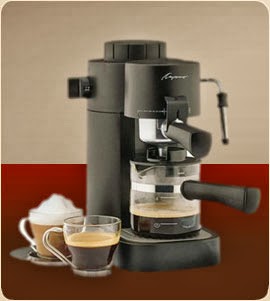
Capresso 4-cup espresso
Knockout box


Small, inexpensive espresso makers are for the occasional espresso drinker; someone who is going to keep it up on a shelf out of the way until they have company over. With this category, you’re going to plan on spending anywhere from $40-$80 on a machine. Krups used to be my go-to brand, but since their outsourcing I’m not as confident recommending them anymore and quite honestly, the store I worked at looked away from the small machines because so many people try to buy these when they really needed something stronger. I would recommend reading recent reviews and sticking with the solid brand names. Capresso hasn’t changed the design of their 4-cup model much over the years and customers always said it was a very solid little machine.

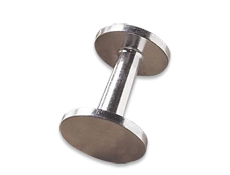
Espresso tamp (2-sided; 2 sizes)


A lot of people are now fascinated with the easier-to-use cup machines like Keurig and Nespresso. Traditional espresso machines generally require you to have a coffee grinder, a tamper to press it into the filter, and if you want to be very fancy, a knockout box to knock the grounds into after brewing. The cup style machines just ask that you buy the little pre-packaged cups, pop them in, and hit brew.

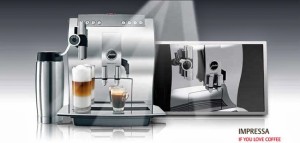
Jura Capresso Z7…my personal favorite (go big or go home, right?!?)

And on the farthest end, you can pay quite a bit to get an electric machine that brews several varieties of coffee drinks and requires very little cleanup. The ones I worked most extensively with were the Jura Capresso machines, and they are AMAZING. These guys just require you keep water in their tank (of which you have size selection, so you could buy something quite large and rarely need to refill it) and beans in the bean hopper. They have so many settings that you can personalize, it’s hard not to love how simple it can be to use! You only have to manually change the grind if you and your housemates disagree on that, the rest is automatic, unless you want to be more manual with them. They now even make them to have thermal milk carafes you can attach to them and it will pull the milk into your beverage and steam or foam it. These do take up quite a bit more counter space and have a heftier price tag, so I can see why the cup machines are selling so well.

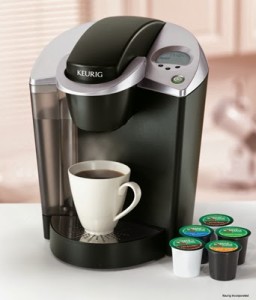
Keurig single-serve coffee machine


So to compare the cup machines! Keurig is obviously the lower pricetag and easier to obtain the special cups required to use it. They’ve also finally started to make machines that can take a special cup you can fill with your own coffee grounds, bypassing their cups if you wanted to. The only downside to these machines is that I’ve never met anyone who’s owned one for more than 2-3 years. (If you have, PLEASE write to me and let me know!) I guess the price tag isn’t too terrible that folks don’t mind replacing them every few years, but to me that is a bit of cash that I’d like to last. I’d also heard lots of bad stories about their customer service when the machines do break down from customers coming to the store I worked at looking to upgrade to the Nespresso machine. Also, technically, the Keurig is a single-serve coffee maker, not really an espresso machine, which is a huge difference to the end user, but when consumers are comparing machines, this is where they are trying to find the difference, usually.

Keurig news alert! In researching this, I discovered that Keurig has a new brewer that takes a different kind of cup. Why? Because they lost their patent on the k-cups! That is why so many other manufacturers are making them now and also how they can be so inexpensive. My bet is Keurig will stop making the original brewers and focus on these new Vue brewers. Don’t fret! Mr. Coffee and Cuisinart both make k-cup brewers now, and I’m sure lots of other manufacturers will follow suit.

Nespresso Citiz


The Nespresso is different from Keurig in a few ways. First off, they only make real coffee, not all these fluffy flavors like “frosted donut” and whatnot that you can find for the Keurig (ok, I just looked and they do now have 3 lightly flavored espresso blends, but basic flavors!) Different beans and blends of some very nice coffees. Their customer service is top-notch and I’ve heard nothing but amazingly nice stories about having to deal with them. And they only allow their cups to be sold at Nespresso outlets or online. They used to sell them at kitchen stores but Williams-Sonoma wasn’t watching shelf dates and actually sold some expired cups to customers. Nespresso is meticulous about their coffee and want to ensure you have the best cup, so they pulled them from the stores to control inventory themselves. The cups have a shelf life of one year, so you can order a lot at once and store them. They charge one flat rate to ship as many as you want, and also offer rush delivery. The store I worked at used to give pods to customers if they needed a few to get them through the weekend or wanted to sample a different blend, so always ask these questions!

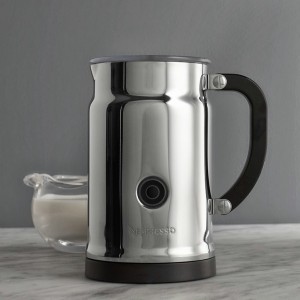
Nespresso Aeroccino

Nespresso machines also have 19 bars of pressure, versus Keurig’s 15 to push the espresso shot out. Everything I’ve researched online varies on what number is actually standard, but from what I have always heard from the various manufacturers I used to sell is that 18 bars is the standard with electric machines. Some of the Jura Capresso’s are lower, but that is because they have thermo-blocking technology which somehow affects that (don’t ask me how! Science! Magic!). Nespresso also has a catch tray for the used pods so you don’t have to discard them immediately like you do with the Keurig (and they are HOT!). Reviews also say that Keurig is one of the slowest single-serve coffee maker on the market, clocking in at 3.5 minutes because of how long it takes to warm up. Nespresso also sells a couple of milk frothers that froth both warm and cold! You can even find it attached to some of their espresso machine models.

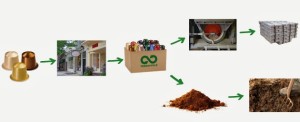
The Nespresso machines also very rarely need descaling, but will tell you when it’s time. Unlike a regular drip coffee maker or other types of espresso machines, there are no internal tubes for the water to run through and buildup in. I hear Keurig users descale theirs a bit more often. And one of the bigger comparisons, wastefulness. K-cups are cheap plastic that’s not recyclable. Nespresso pods are in aluminum foil, so you can peel them open, compost the grounds, and recycle the pod. Alternately, Sur la Table participates in a TerraCycle upcycling program, so you can take your empty pods in to Sur la Table and they will send them in to be upcycled into something new. Alternately, you could potentially register with TerraCycle yourself (or encourage your local kitchen retailer to join for your community!), and they pay for the shipping to turn the pods in.

TerraCycle upcycles the Nespresso pods into new products and composts the coffee grounds.

Also, I can’t not add that George Clooney is the spokesperson for Nespresso. Classy. I’m serious; Google image search “Nespresso” and Mr. Clooney’s serious espresso-drinking face will be all over your screen. 😛

Nespresso. What else would George Clooney drink? 😉

With both the Keurig and Nespresso machines, it is good to keep in mind that these machines will end up costing you a lot of money in the long run if you are a big coffee drinker. These machines are meant for the occasional drinker who drinks maybe 1-2 cups per day. Any more than that and your coffee bill for the year is going to be a lot larger than with a larger scale machine like the Juras or a regular drip machine. Yes, they are convenient to use, but if you are using them that heavily, you’re going to have to descale that much more often, which also puts a damper on the whole “easier to use” bit.

Coffee Grinder Information
Coffee Maker Basics

Coffee Grinders

Coffee grinders are a pretty easy topic to discuss because it’s pretty straightforward as to what the differences are and most brands are good. What you need to know as the end user is whether or not these things are actually grinding your beans or just hacking at them.

You pay a lot for whole beans, usually. If you’re one of those folks after the perfect cup, you want the best grinder for your expensive beans. If you’re just after a fresher grind, it might not matter as much, just as long as you’ve got a cup of coffee.

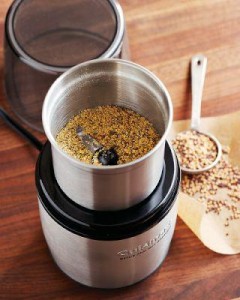
Cuisinart Spice and Nut Grinder

 Basic grinders tend to run about $20-40 a piece. These grinders aren’t actually grinders at all, but mini choppers. A lot of people actually purchase these to grind spices. Cuisinart now makes one specifically for grinding spices because of consumer complaints with regards to utilizing coffee grinders (they aren’t technically for spices, people! Haha). I would take a look at the blades and if at least one has an end piece pointing downwards, it’s probably decent for spices. The Cuisinart Spice and Nut Grinder is nicer because it’s larger, the blades cut lower into the cup, and the cup is removable so it’s easy to clean.

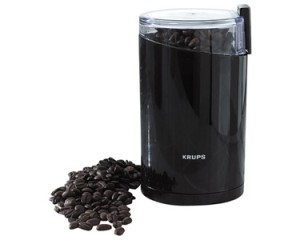
Krups Fast Touch coffee grinder

As for actually using a basic grinder for coffee, it’s just kind of hacking at your beans until you stop hacking. The more you hack, the more you reduce the flavor you’re going to get out of the beans. So if you’re spending a lot on beans, you might want to consider a burr grinder instead. Krups, Kitchen Aid, and Cuisinart all make decent basic coffee grinders, however. You put the beans in the container, put the lid on which usually also doubles as the power button on most basic grinders, and power the grinder until the beans are ground to your desired consistency. Remove the lid and dump the grounds out. The container doesn’t come apart for cleaning, which can make it difficult to switch between beans and spices.

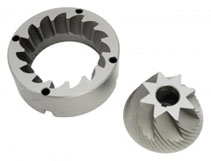
Burr grinders are great because they actually grind. You should be able to pull the burrs out for cleaning, so you can actually see how they align based on the grind settings you choose on the machine, making them closer or further apart from each other. These types of grinders are definitely preferred if you need a specific type of grind for something like French press or stovetop espresso, because you have actual settings to make it coarse or fine. You place the beans in the hopper at the top, and select your grind. A lot of burr grinders also have a selection for how many cups of coffee you’re brewing and will only grind that many beans for you.

These are the metal burrs.

There’s a slight downside to burr grinders, in that sometimes the beans can get clogged up because they all fall into the same spot while the machine is running. What you see more of on the market now are conical burr grinders. This is still the same burr grinder, but there’s a cone above the burrs to help the beans spread out as they fall downward into them. I think almost all grind and brew machines now come with conical burr grinders at this point, and it’s pretty difficult to find a stand-alone grinder that’s not conical, as well.

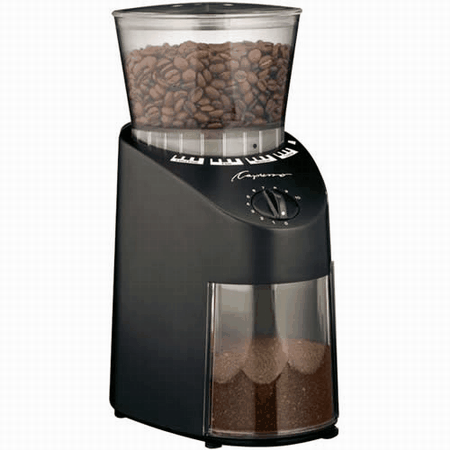
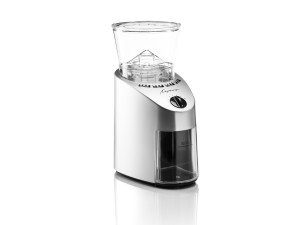
Capresso Infinity conical burr grinder

Capresso makes the most highly rated conical burr grinder and I can’t begin to tell you how many of these I’ve sold. The cup at the base that catches the grounds is anti-static, helping to keep them from sticking to the cup. It has a plethora of size settings and is a pretty reasonable price next to its competitors. Breville is also a good grinder, I’ve heard.

Empty so you can see the plastic cone in the hopper  

Coffee bean storage tip! Do NOT freeze your beans! This does nothing to help keep them fresh and actually makes the grounds staticky when you grind them. All of the experts will tell you this.

Another word of caution: I mention this in my drip coffee maker blog, but beware of grind and brew coffee makers. If the grinder is housed in the same area as the water tank, there’s higher potential for the grounds to get wet and the grinder to become clogged. Getting a machine where these components are separated is recommended, although the warm, moist air can still make its way over to the grinding unit sometimes.

Capresso CoffeeTeam grind and brew machine

Coffee Maker Basics